How to Set Up Color-Changing LED Strip Lights in your Room
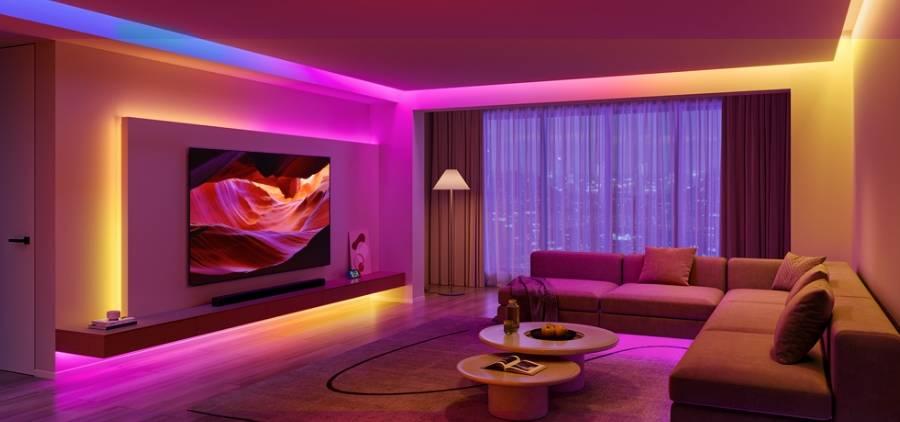
Have you ever wanted to create the perfect ambiance in your room? Well, look no further than color-changing LED strip lights. These versatile lights are all the rage among content creators and gamers who want to add a touch of magic to their bedrooms and living spaces. In this DIY guide, we'll walk you through the step-by-step process of setting up RGB LED strips to transform your room into a vibrant and customizable haven.
>>> See more Do LED Light Strips Ruin Walls? at:
https://glose.com/activity/6406ac8e9e60d807831ae1c3
Planning is Key
Before you dive into the installation process, it's crucial to plan everything out. Measure your room and determine where you want the LED strips to go. Consider the length of the strips and how they will connect to the power supply. If you have multiple lengths or corners to navigate, make sure to plan for those sections as well.
Step 1 PRO TIPS
Sketch out a rough layout of your room, marking where the lights will go and where you plan to power them from.
Account for the distance between the power supply and the LED strip start location, as well as the distance between strips. You may need jumpers or extra wire to fill these gaps.
Understanding Different Strip Options
LED strip lights come in various options, each with its own unique features. When choosing RGB color-changing strips, you'll encounter a few different options:
RGB, Non-Addressable: These strips have each LED capable of displaying red, green, blue, or all three colors simultaneously. The color changes by adjusting the voltage applied to each color channel.
RGB, Addressable: Similar to non-addressable strips, but each LED has a control line for individual triggering and special effects. Currently under development and not yet available.
RGBW or RGBWW: These strips combine single color whites with RGB, providing even more lighting possibilities.
Considering Density and Waterproofing
LED strips also vary in density, referring to the number of LEDs per foot or meter. The common densities for RGB strip lights are:
Standard Density: 30 LEDs per meter
High Density: 60 LEDs per meter
RGB + White Strip: 96 LEDs per meter (alternating RGB/single color diodes)
>>> See more Beyond their decorative allure, above-ground pool lights at:
https://twitter.com/ledlightsblls/status/1714579861891850352
Higher density strips produce more light but consume more power. For most bedroom applications, 30 LEDs per meter is sufficient. However, if you have larger or more spacious areas, you may consider opting for higher density.
Waterproofing the strips depends on the area of application. For dry areas like bedrooms, non-waterproof strips are suitable. If you plan to install strips in areas with moisture, such as bathrooms or kitchens, water-resistant or waterproof options are recommended.
Finding the Right Power Supply
Determining the appropriate power supply for your LED strips requires some calculations. Consider the required input voltage and maximum power consumed by your RGB strip. Most flexible color-changing strip lights operate on 12-24 volts DC.
To estimate the wattage, refer to the wattage tables provided by LED suppliers. The wattage may vary depending on the strip length and type. It's essential to choose a power supply with a slightly higher wattage than your calculated estimate to avoid operating at maximum capacity.
Step 3 PRO TIP
If you have an in-between length that is not listed in the tables, calculate the wattage by adding the wattage for the nearest lengths.
When it comes to controllers, make sure to select one that can handle the wattage of your strip lights. Check the maximum amperage of the controller and multiply it by the input voltage to determine its maximum wattage capacity.
Connecting and Installing the Strips
Connecting and installing LED strip lights is relatively straightforward. There are two common methods: using connectors or soldering the strips together. Soldering provides a more permanent connection, but modern connectors are also reliable.
When cutting the strip lights, you'll find four connection points on the cut end: +12V, R (red), G (green), and B (blue). These connection points need to be maintained throughout the strip run to ensure consistency in color. Using a 4-conductor wire between the strips is the best practice.
Connectors with 4-pins on the strip side pierce through the copper solder pads to establish a secure connection. The other end of the connector allows you to slide in the corresponding wire and clamp it down for a reliable connection. Repeat this process for any breaks in your LED strips, ensuring not to exceed the maximum run length of your RGB strip.
>>> See more How Long Do LED Pool Lights Last? at:
https://www.deviantart.com/ledlightsblls/status-update/How-Long-Do-LED-Pool-988508341How to Set Up Color-Changing LED Strip Lights in your Room
Have you ever wanted to create the perfect ambiance in your room? Well, look no further than color-changing LED strip lights. These versatile lights are all the rage among content creators and gamers who want to add a touch of magic to their bedrooms and living spaces. In this DIY guide, we'll walk you through the step-by-step process of setting up RGB LED strips to transform your room into a vibrant and customizable haven.
>>> See more Do LED Light Strips Ruin Walls? at: https://glose.com/activity/6406ac8e9e60d807831ae1c3
Planning is Key
Before you dive into the installation process, it's crucial to plan everything out. Measure your room and determine where you want the LED strips to go. Consider the length of the strips and how they will connect to the power supply. If you have multiple lengths or corners to navigate, make sure to plan for those sections as well.
Step 1 PRO TIPS
Sketch out a rough layout of your room, marking where the lights will go and where you plan to power them from.
Account for the distance between the power supply and the LED strip start location, as well as the distance between strips. You may need jumpers or extra wire to fill these gaps.
Understanding Different Strip Options
LED strip lights come in various options, each with its own unique features. When choosing RGB color-changing strips, you'll encounter a few different options:
RGB, Non-Addressable: These strips have each LED capable of displaying red, green, blue, or all three colors simultaneously. The color changes by adjusting the voltage applied to each color channel.
RGB, Addressable: Similar to non-addressable strips, but each LED has a control line for individual triggering and special effects. Currently under development and not yet available.
RGBW or RGBWW: These strips combine single color whites with RGB, providing even more lighting possibilities.
Considering Density and Waterproofing
LED strips also vary in density, referring to the number of LEDs per foot or meter. The common densities for RGB strip lights are:
Standard Density: 30 LEDs per meter
High Density: 60 LEDs per meter
RGB + White Strip: 96 LEDs per meter (alternating RGB/single color diodes)
>>> See more Beyond their decorative allure, above-ground pool lights at: https://twitter.com/ledlightsblls/status/1714579861891850352
Higher density strips produce more light but consume more power. For most bedroom applications, 30 LEDs per meter is sufficient. However, if you have larger or more spacious areas, you may consider opting for higher density.
Waterproofing the strips depends on the area of application. For dry areas like bedrooms, non-waterproof strips are suitable. If you plan to install strips in areas with moisture, such as bathrooms or kitchens, water-resistant or waterproof options are recommended.
Finding the Right Power Supply
Determining the appropriate power supply for your LED strips requires some calculations. Consider the required input voltage and maximum power consumed by your RGB strip. Most flexible color-changing strip lights operate on 12-24 volts DC.
To estimate the wattage, refer to the wattage tables provided by LED suppliers. The wattage may vary depending on the strip length and type. It's essential to choose a power supply with a slightly higher wattage than your calculated estimate to avoid operating at maximum capacity.
Step 3 PRO TIP
If you have an in-between length that is not listed in the tables, calculate the wattage by adding the wattage for the nearest lengths.
When it comes to controllers, make sure to select one that can handle the wattage of your strip lights. Check the maximum amperage of the controller and multiply it by the input voltage to determine its maximum wattage capacity.
Connecting and Installing the Strips
Connecting and installing LED strip lights is relatively straightforward. There are two common methods: using connectors or soldering the strips together. Soldering provides a more permanent connection, but modern connectors are also reliable.
When cutting the strip lights, you'll find four connection points on the cut end: +12V, R (red), G (green), and B (blue). These connection points need to be maintained throughout the strip run to ensure consistency in color. Using a 4-conductor wire between the strips is the best practice.
Connectors with 4-pins on the strip side pierce through the copper solder pads to establish a secure connection. The other end of the connector allows you to slide in the corresponding wire and clamp it down for a reliable connection. Repeat this process for any breaks in your LED strips, ensuring not to exceed the maximum run length of your RGB strip.
>>> See more How Long Do LED Pool Lights Last? at: https://www.deviantart.com/ledlightsblls/status-update/How-Long-Do-LED-Pool-988508341